
렌즈 왜곡 (Lens Distortion)
렌즈 왜곡 효과는 최종 렌더링된 그림을 왜곡하여 실제 카메라 렌즈의 모양으로 만들어 줍니다.
참고 : https://docs.unity3d.com/Packages/com.unity.render-pipelines.universal@7.1/manual/Post-Processing-Lens-Distortion.html
Lens Distortion | Universal RP | 7.1.8
Lens Distortion The Lens Distortion effect distorts the final rendered picture to simulate the shape of a real-world camera lens. Using Lens Distortion Lens Distortion uses the Volume framework, so to enable and modify Lens Distortion properties, you must
docs.unity3d.com
[유니티(Unity)] (Post Process) start
시작에 앞서 유니티 Post Process를 공부하면서 정리할 겸 기능과 효과들을 하나하나 블로그에 정리해 나갈 생각입니다. 독학으로 하는 공부다 보니 빠진 부분과 틀린 부분이 있으면 댓글 남겨 주
junbastick.tistory.com
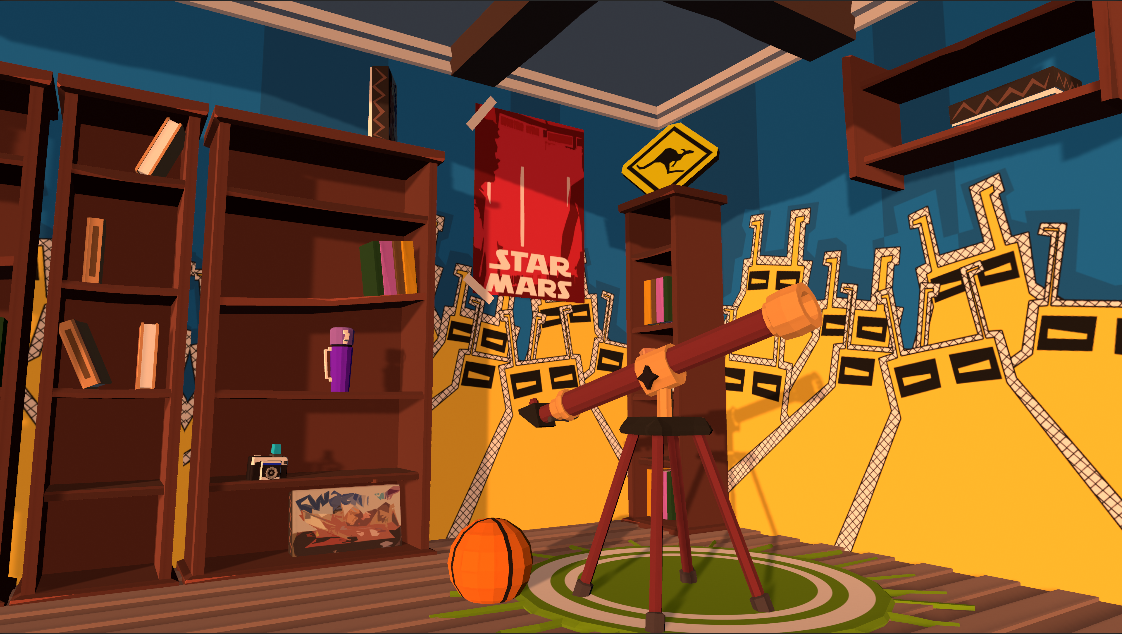
기본 준비
테스트 환경은 저번에 사용했던 환경을 재활용해 보겠습니다.
Lens Distortion 설명
참고 : https://learn.unity.com/tutorial/post-processing-effects-lens-distortion#
Post Processing Effects: Lens Distortion - Unity Learn
Lens Distortion can be used for simple effects like creating a fisheye lens for instant replay in skateboarding games or emulating different cinema lenses.
learn.unity.com
참고 : https://docs.unity3d.com/Packages/com.unity.render-pipelines.universal@7.1/manual/Post-Processing-Lens-Distortion.html
Lens Distortion | Universal RP | 7.1.8
Lens Distortion The Lens Distortion effect distorts the final rendered picture to simulate the shape of a real-world camera lens. Using Lens Distortion Lens Distortion uses the Volume framework, so to enable and modify Lens Distortion properties, you must
docs.unity3d.com
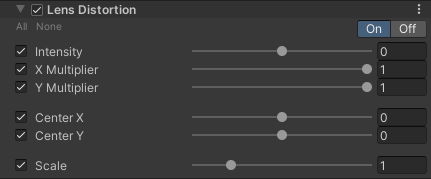
| 속성 | 설명 |
| Intensity | 슬라이더를 사용하여 왜곡 효과의 전체 강도를 설정합니다. 양수 값일 경우 렌즈가 볼록 하게 보이며 음수 값일 경우는 오목 하게 보입니다. |
| X Multiplier | 슬라이더를 사용하여 x축의 왜곡 강도를 설정합니다. 이 값을 0으로 설정하면 x축의 왜곡이 비활성화 됩니다. |
| Y Multiplier | 슬라이더를 사용하여 y축의 왜곡 강도를 설정합니다. 이 값을 0으로 설정하면 y축의 왜곡이 비활성화 됩니다. |
| Center X | 화면에서 왜곡 효과의 중심점을 설정합니다. 중심점의 x축을 설정할 수 있습니다. |
| Center Y | 화면에서 왜곡 효과의 중심점을 설정합니다. 중심점의 y축을 설정할 수 있습니다. |
| Scale | 장면의 크기를 결정합니다. 값이 1보다 크면 가상 렌즈가 확대되고 값이 1보다 작으면 장면이 바둑판식으로 만들어 집니다. |
테스트
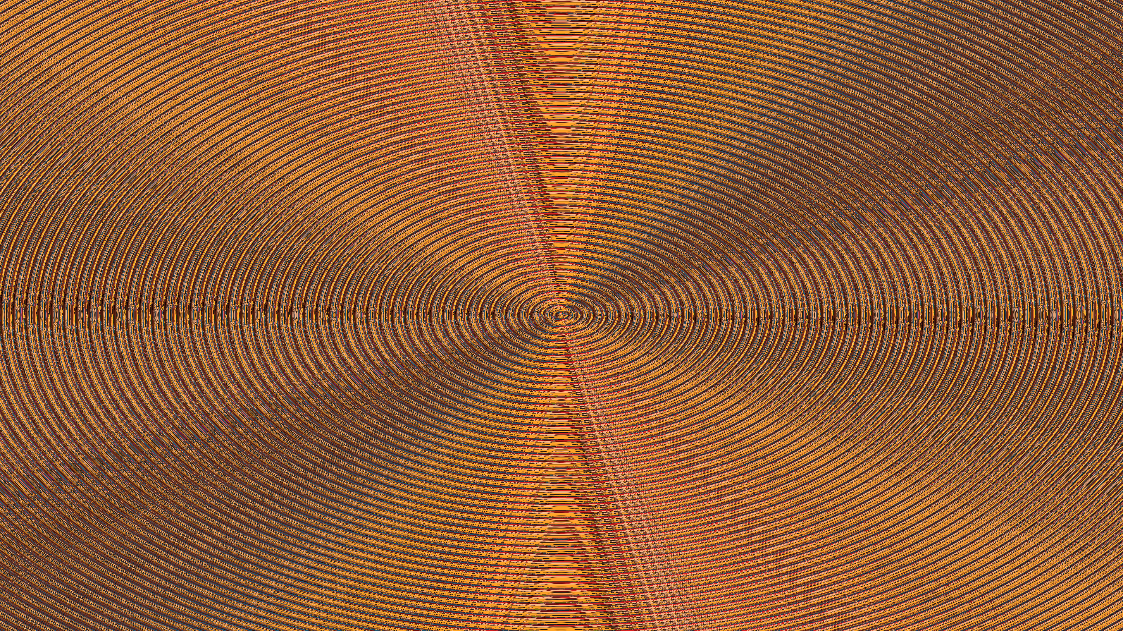
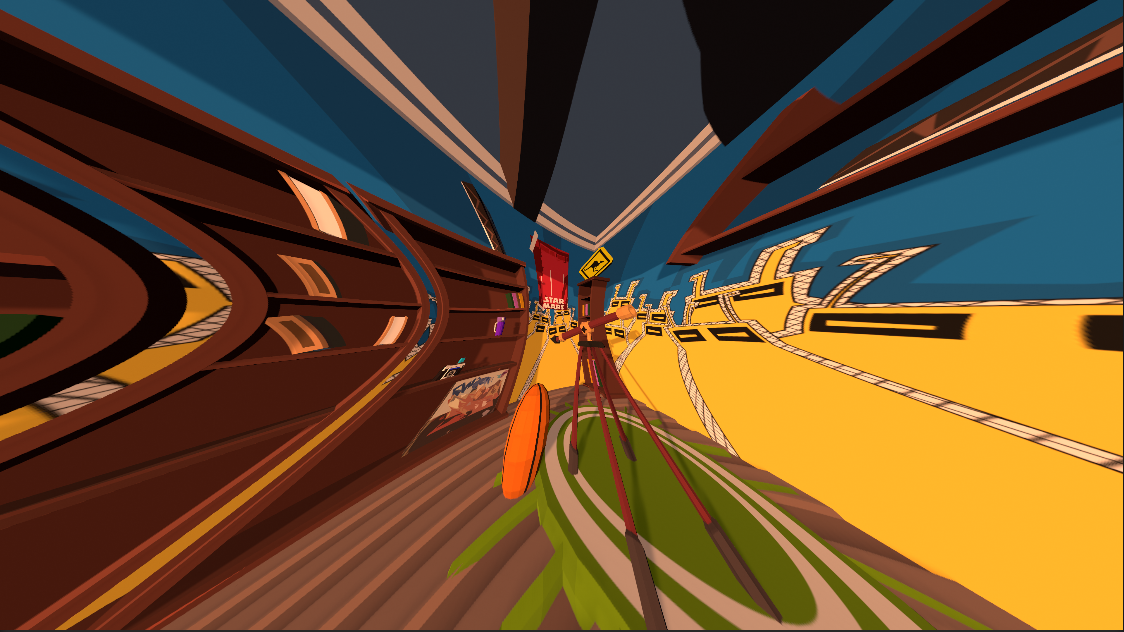
Intensity

Multiplier
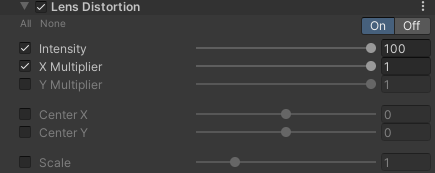
Intensity 를 100으로 설정하고 테스트를 진행 하겠습니다.

Center


Scale